
If you're reading this after another day of shifting in your chair, stretching your back every few minutes, or hesitating before you bend to pick something up, you're not alone. Chronic back pain often changes small decisions first. You sit differently, move more cautiously, and start to wonder whether exercise will help or stir things up.
That's where a lot of advice gets unhelpful. Most online content treats core stability exercises as a fitness challenge, usually built around harder planks, visible abs, or “burn”. But for people living with pain, especially recurring low back pain, the key question is more practical. Which movements help you feel steadier, safer, and more capable during ordinary life? Australian evidence points to that exact gap. Mainstream content often stays generic, while people with back pain need condition-specific guidance that fits pain, flare-ups, and day-to-day function, as discussed in Australian reporting on low back pain and musculoskeletal burden.
An osteopathic view starts in a different place. The aim isn't to “tighten your abs”. The aim is to help your body organise movement better, reduce unnecessary strain, and build a calmer, more reliable base for walking, lifting, standing, and getting through the day. That usually means starting gently, choosing positions your body can tolerate, and progressing only when control improves.
Table of Contents
- Your Guide to Gentle Core Stability
- Understanding Core Stability vs Core Strength
- Foundational Exercises to Begin Your Journey
- How to Progress Safely and Intelligently
- Putting It Together Sample Weekly Routines
- When Exercises Arent Enough Your Osteopath Can Help
Your Guide to Gentle Core Stability
The word “core” often makes people think of crunches, boot camps, or long plank holds. For chronic pain, that framing usually misses the point. In practice, core stability is less about force and more about control. It's your body's ability to hold a comfortable centre while your arms, legs, and spine do their work.
That matters because back pain rarely behaves like a simple weakness problem. Many people with pain are already trying hard. They brace, stiffen, and grip through movement, yet still don't feel secure. A gentler approach can work better because it teaches support without over-tension.
Practical rule: If an exercise makes you feel more compressed, more guarded, or more breathless, it's probably too much for where your system is right now.
From an osteopathic perspective, stable movement is a whole-body skill. Your breathing, rib position, pelvic control, hip movement, and spinal comfort all contribute. That's why the right core stability exercises often look surprisingly modest at first. A small pelvic tilt done well can be more useful than an aggressive plank done poorly.
People with desk-based routines, arthritis, recurrent flare-ups, or stiffness usually do best when they build from the floor up. They need exercises that calm the body and improve coordination, not drills that provoke pain and leave them feeling they've failed. The aim is to give you a starting point that feels achievable today.
Understanding Core Stability vs Core Strength
Many people have been told they need a “stronger core”, but that phrase can be misleading. In clinic, the more useful question is whether your body can control movement well enough to protect irritated tissues and share load efficiently.
Think of your core as a supportive canister
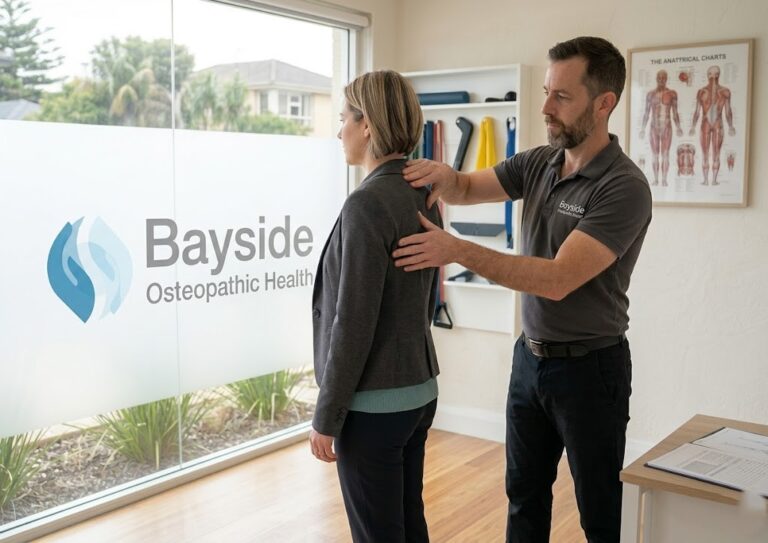
A simple way to understand it is to picture a canister or cylinder in the middle of your body. The diaphragm forms the top, the pelvic floor forms the base, and the deep abdominal and spinal muscles help wrap and support the sides and back. When these parts work together, they help you manage pressure and keep the trunk organised while you breathe, shift, reach, and lift.
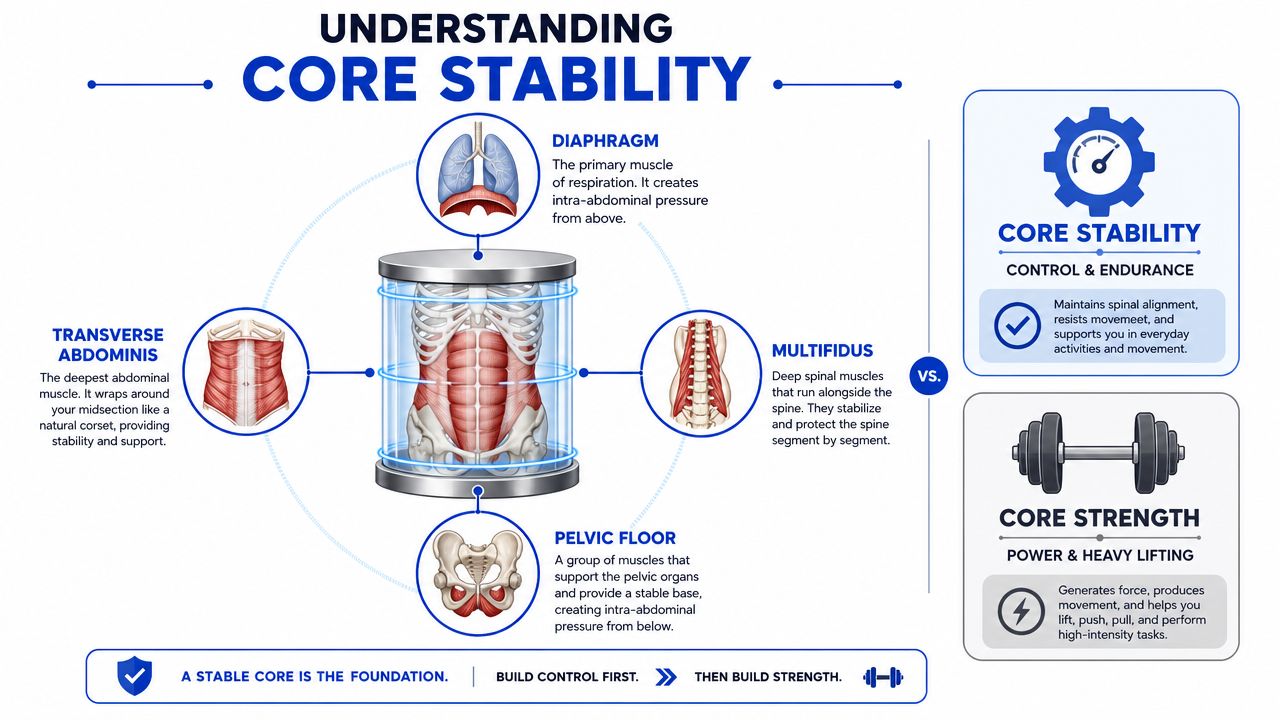
If your work keeps you sitting for long stretches, it helps to also look at how your posture and workstation influence the way you brace and breathe during the day. This workstation posture image from Bayside Osteopathic Health gives a simple visual reminder that trunk support isn't just something you switch on for exercise.
Strength and stability are not the same job
Core strength is about producing force. That can include heavy lifting, strong flexion, or powerful bracing. Core stability is about timing, endurance, and subtle control. It's the difference between a body that can create effort and a body that can stay organised while moving.
You can have visible abdominal muscles and still lack comfortable spinal control. You can also have no interest in gym training and still improve your core stability in a meaningful way. That distinction matters for back pain.
A systematic review of core stabilisation exercises for nonspecific low back pain found that the included studies reported lower pain ratings and improved self-reported and muscular function after training, and the review concluded that core stabilisation was an effective treatment option with Grade B evidence, according to the systematic review in the International Journal of Sports Physical Therapy.
Better support doesn't usually come from “working harder”. It comes from coordinating breathing, ribs, pelvis, and spine so the effort goes where it should.
That's why a pain-focused approach usually starts with lower-load positions. They give you a chance to find support without fighting gravity too much or pushing through a compensatory pattern.
Foundational Exercises to Begin Your Journey
Gentle starting positions often work best because they reduce noise. You can notice your breathing, feel whether your ribs are flaring, and tell the difference between abdominal support and low-back gripping.
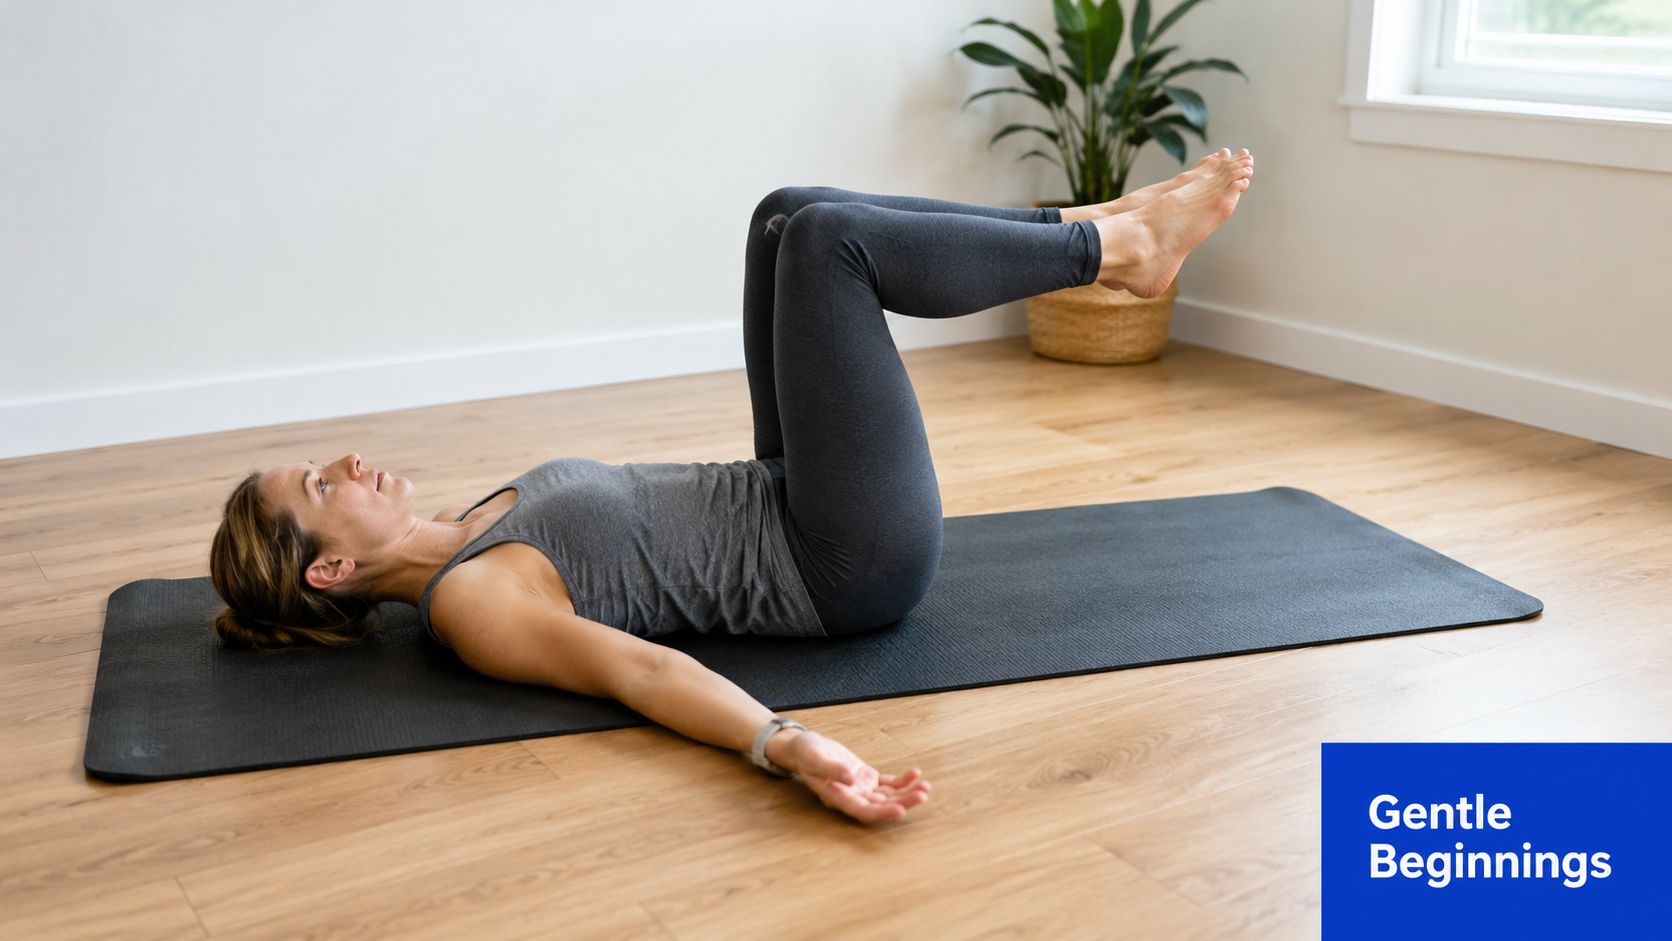
Rehabilitation guidance commonly starts with low-load positions such as supine 90/90 bracing and neutral-spine bridges, with 1 set of 12–15 repetitions as a practical benchmark, while focusing on preventing the low back from arching, as outlined in this rehabilitation overview of core stabilisation approaches. If you'd like a visual example of guided movement work, this rehabilitation exercise image from Bayside Osteopathic Health reflects the kind of calm, supported setup that suits early-stage practice.

How to start without irritating your back
A few principles matter more than the exercise list itself:
- Choose comfort first. Mild muscular effort is fine. Sharp, catching, or radiating pain is not.
- Breathe throughout. If you have to hold your breath to complete the movement, the task is too difficult.
- Keep the spine quiet. The goal is not to force the back flat. The goal is to avoid excessive arching or hinging.
- Stop before fatigue changes the pattern. A shorter, cleaner set is more useful than pushing on with poor control.
Supine 90 90 bracing
Lie on your back with your hips and knees bent to 90 degrees, so your lower legs are supported on a chair, couch, or held in tabletop if that feels easy enough. Let your neck stay relaxed.
- Place one hand on your lower ribs and one on your lower abdomen.
- Take a quiet breath in through the nose.
- As you breathe out, gently draw the front of the lower abdomen inward without flattening your whole back into the floor.
- Hold that light brace while taking the next breath in.
- Repeat for 1 set of 12–15 repetitions if the position remains comfortable.
What you should feel is a mild wrap of support around the lower trunk. You shouldn't feel your neck gripping, your jaw clenching, or your low back pressing hard into the floor.
Pain-free start: Put your feet on the floor instead of lifting the legs if tabletop feels too demanding.
Glute bridge with a neutral spine
This exercise helps you use the hips without defaulting to lumbar extension. That trade-off matters. Many people think they are “working the core” when they're hinging through the lower back.
Lie on your back with knees bent and feet flat. Before lifting, soften the ribs and gently brace the lower abdomen. Press through the feet and lift the pelvis only to the point where the front of the hips opens without the ribs popping up.
Hold the top position for three deep breaths if you can keep the pelvis level and the low back comfortable. Then lower slowly. Aim for 1 set of 12–15 repetitions when the motion stays controlled.
If you feel the bridge mostly in your back, reduce the height. A lower bridge done with good alignment is usually the better exercise.
Common mistakes include pushing too high, arching the low back, or driving from the hamstrings while the ribs flare. Think of length through the front of the body rather than height.
Pain-free start: Lift only a few centimetres, or practise the setup without lifting at all by pressing gently into the feet and feeling the glutes switch on.
A guided movement demonstration can help if you learn better by watching than reading:
Pelvic tilts
Pelvic tilts are simple, but they're valuable because they teach awareness. Many people with chronic pain have lost a clear sense of where neutral sits between over-arching and flattening.
Try this slowly:
- Start on your back with knees bent and feet flat.
- Gently tip the pelvis back so the lower back eases a little closer to the floor.
- Then release forward only slightly, without dropping into a large arch.
- Move in a small range and notice whether the ribs stay soft and the neck stays easy.
This isn't a strength test. It's a control drill. If you can find this motion easily, your later exercises usually improve because you have a reference point for neutral.
Pain-free start: Make the movement tiny. Even a very small tilt can be enough to restore awareness and reduce protective gripping.
How to Progress Safely and Intelligently
Progression shouldn't mean bigger effort for its own sake. The next step in core stability exercises is usually about resisting movement, especially unwanted arching and rotation, while the limbs move.
Progression means better control
More advanced drills are coached around anti-extension and anti-rotation. In plain language, that means your trunk learns not to collapse into an arch or twist while your arms and legs create challenge. Typical progressions include bird-dog variations and plank variations, with 10–30 second holds for planks and 8–12 reps for dynamic drills as standard starting loads, based on this advanced core exercise guidance.
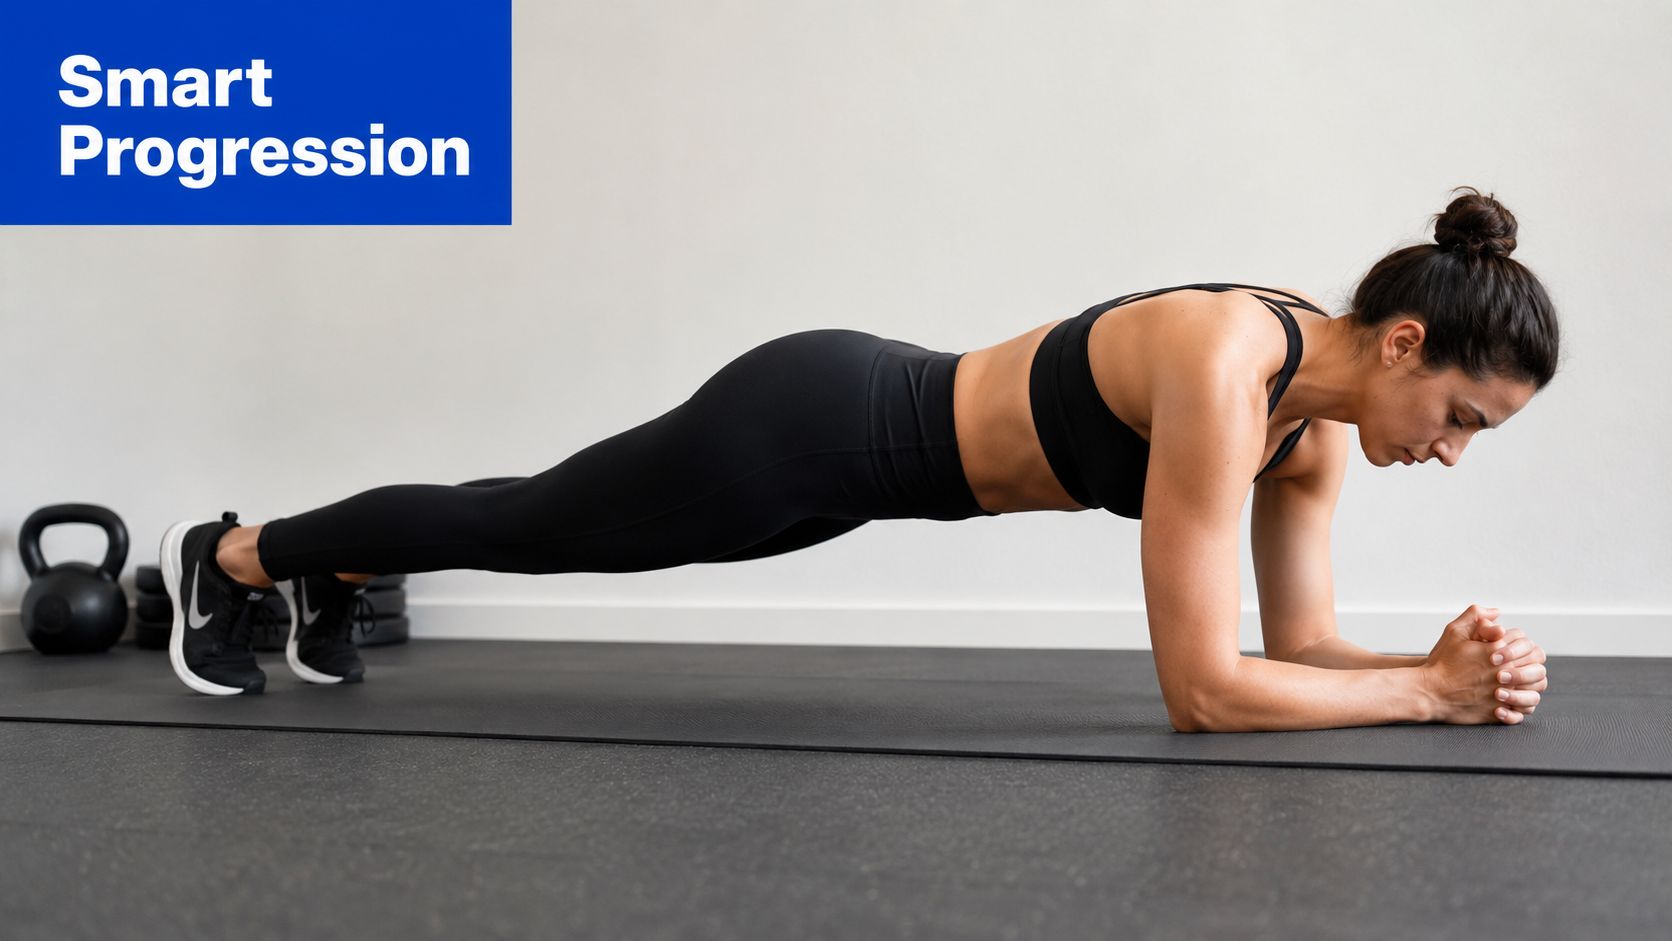
A useful rule is to make the body more stable before making it stronger. If your pelvis rocks, your ribs flare, or your back sags, you haven't “failed”. You've found the current limit of control.
Bird dog
Start on hands and knees with your spine in a comfortable neutral position. Think long through the back of the neck. Lightly brace the abdomen before moving.
Reach one leg back only as far as you can without the pelvis rotating. If that feels steady, add the opposite arm reaching forward. Return slowly and alternate sides for 8–12 reps.
The common mistake is trying to lift too high. That usually twists the pelvis or tips the low back into extension. A shorter reach is often the right answer.
Dead bug
This is an excellent choice for people who want challenge without weight-bearing through the wrists. Lie on your back with your arms toward the ceiling and knees in tabletop.
Lower one heel or one arm at a time while keeping the ribs settled and the lower back from arching. If that stays easy, use opposite arm and leg. The motion should be slow enough that you can stop instantly if you lose control.
Try these corrections if it feels messy:
- Ribs popping up means reduce the range.
- Neck tension means support your head or lower the arms less.
- Back arching means return to one limb at a time.
Modified plank on the knees
A knee plank is often more useful than a full plank for pain-sensitive backs because it lets you practise alignment before load gets high. Set up on forearms and knees, then create a straight line from shoulders through hips to knees.
Hold for 10–30 seconds only if you can keep the low back from sagging and the shoulders from shrugging. Breathing should stay smooth. If you're shaking and breath-holding, shorten the hold.
The aim of a plank isn't to survive it. The aim is to keep the trunk organised while breathing normally.
A few warning signs tell you to regress:
- Hips dropping means the lever is too long or the hold is too long.
- Shoulders creeping toward the ears means upper body tension is taking over.
- Low back pressure means stop and return to a simpler version.
Progress only one variable at a time. Increase hold duration, or add a small limb movement, or reduce your base of support. Don't change all three at once.
Putting It Together Sample Weekly Routines
A routine only works if you can repeat it without dreading it. For chronic pain, consistency usually matters more than intensity. A shorter session done calmly and regularly is often more productive than occasional hard efforts.
Routine ideas you can actually stick to
Use these as templates, not rigid rules. If you're having a stiff day, reduce the range or drop back to the easier option. If you feel settled and in control, continue. The point is to build trust in movement.
| Routine | Frequency | Duration | Exercises |
|---|---|---|---|
| Gentle Start | Most weeks, on a regular pattern that feels manageable | About 10 to 15 minutes | Pelvic tilts, supine 90/90 bracing, low glute bridge holds for three deep breaths, easy walking afterwards |
| Building Resilience | On a steady weekly rhythm with rest days between harder sessions if needed | About 20 minutes | Supine 90/90 bracing, glute bridge, bird dog, dead bug, modified plank on knees |
| Desk Worker Reset | On days with prolonged sitting | Brief movement break | Pelvic tilts, gentle brace practice, short walk, then one control exercise such as dead bug or bridge |
| Older Adult Stability Focus | Repeated across the week at a comfortable pace | Short and steady | Bridge variation, supported bird dog, balance practice near a bench or wall, easy walking |
A few practical choices make these routines easier to keep:
- Anchor the session to something fixed such as after breakfast or before your evening shower.
- Finish while you still feel good rather than squeezing in extra reps.
- Pair core work with walking so your body practises carrying that support into normal movement.
If your symptoms vary, keep a simple note of which exercises feel calming, which feel neutral, and which seem to aggravate you. Patterns often become clearer than you expect.
When Exercises Arent Enough Your Osteopath Can Help
Home exercise is useful, but it isn't always enough on its own. Some people do the right movements and still feel stuck because another part of the body keeps pulling them out of a good pattern. Tight hips, a stiff thoracic spine, guarded breathing, irritated joints, or fear around movement can all interfere.
Australian patients who are older, sedentary, or managing joint issues often need more nuanced guidance than generic exercise articles provide. They need scaling, breathing support, and a way to combine stability work with balance and mobility without aggravating symptoms, as reflected in this discussion of core stabilisation needs for older adults and desk-bound individuals.
Signs you need more than home exercise
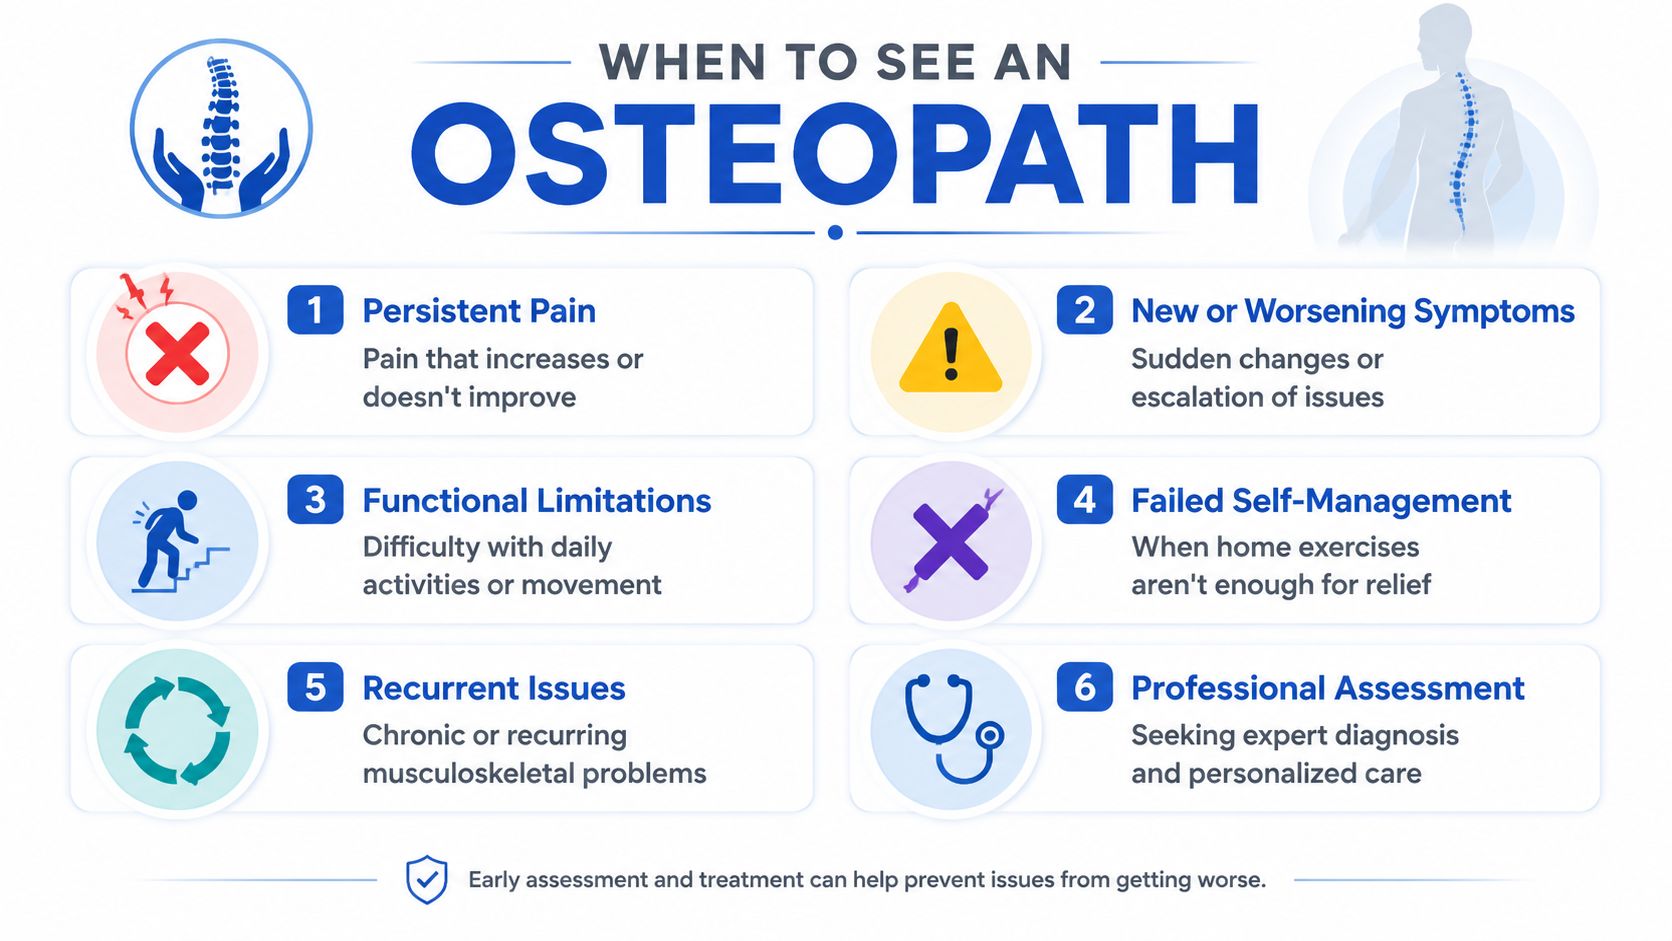
The following situations usually justify a professional assessment:
- Pain increases during or after exercise rather than settling within a reasonable time.
- Symptoms become sharp, spreading, or unsettling rather than feeling like ordinary muscular effort.
- You can't find a comfortable starting position even after simplifying the movements.
- You feel stuck in the same pattern and don't know whether technique, load, or another body region is the issue.
- Daily function isn't improving even though you're trying to move more consistently.
What an osteopathic assessment adds
An osteopath doesn't just hand over an exercise sheet. The assessment looks at how your whole body contributes to the problem. That can include how your hips rotate, how your ribs move with breathing, whether your upper back is stiff, and how your pelvis and spine coordinate under light load.
Hands-on care may help reduce protective tension and make movement feel less guarded. Then the exercise prescription can be adjusted to suit your actual presentation, not a generic routine. For some patients, that means fewer exercises and better cues. For others, it means addressing balance, walking mechanics, or arthritic stiffness before pushing core work.
At Bayside Osteopathic Health's allied health care plan guide, you can see the kind of practical care pathway often discussed when exercise needs to sit alongside broader musculoskeletal support.

When the right exercise still doesn't feel right, the missing piece is often assessment, not effort.
If your back still feels fragile, your exercises keep flaring symptoms, or you want a more personalised plan, Bayside Osteopathic Health offers gentle, hands-on osteopathic care with personalized movement advice for back pain, joint stiffness, postural strain, and day-to-day mobility. A thorough assessment can help you work out which core stability exercises suit your body, which ones need modifying, and when hands-on treatment may help you move with more comfort and confidence.