
Does your workstation look acceptable at a glance, yet leave your neck tight, your wrists sore, or your lower back aching by the middle of the day? A well-built office ergonomics checklist helps close the gap between a desk that looks functional and one that supports your body through a full workday.
Many desk workers hear simple advice like “sit up straight,” but the body is not a statue. It is more like a linked chain. A small mismatch at the screen, chair, or feet can travel upward or downward and change how the rest of you works. A monitor that is slightly low can invite a forward head position. Feet that do not feel supported can tilt the pelvis and increase strain through the low back. Those patterns matter even more for remote employees working with kitchen tables, laptops, or shared spaces.
This printable 8-step checklist is designed to make those details easier to spot and fix. It combines standard workstation setup with an osteopathic perspective, which looks at how structure and function affect each other across the whole body. It also includes chronic-pain adaptations, because a setup that suits a symptom-free person may not suit someone managing stiffness, nerve irritation, migraines, or recurring flare-ups.
Good ergonomics is not about holding one “perfect” posture all day. It is about building a workspace that gives your body support, balance, and room to vary position without extra strain.
Use this introduction as a starting point, then work through the checklist step by step. By the end, you should have a clearer sense of what to adjust, why it matters, and how to make practical changes that fit both office and home workstations.
Table of Contents
- 1. Monitor Height and Distance Adjustment
- 2. Chair Height and Lumbar Support Configuration
- 3. Keyboard and Mouse Positioning
- 4. Desk Height and Work Surface Organization
- 5. Footrest Usage and Lower Limb Support
- 6. Document Holder and Reference Material Positioning
- 7. Lighting and Glare Reduction Assessment
- 8. Movement Breaks and Postural Variation Protocol
- 8-Point Office Ergonomics Checklist Comparison
- Next Steps to a Healthier Workspace
1. Monitor Height and Distance Adjustment
What happens to your neck when your eyes have to look down at a screen for eight hours? For many desk workers, the answer is a slow drift forward through the head, upper back, and rib cage. That pattern matters in osteopathic care because the body does not work in isolated parts. If the screen position is off, the neck often compensates, then the shoulders, jaw, and breathing muscles join in.
Set your screen for a comfortable visual line
Start with one simple goal. Let your eyes meet the screen without your chin lifting or dropping.
Generally, the monitor sits about an arm's length away, often around 50 to 70 cm, with the top of the screen near eye level or a little below. Your natural gaze should fall into the upper third of the display, not to the bottom edge. You are aiming for a neutral viewing angle, the same way you would hold a book at a height that lets you read without bending toward it.
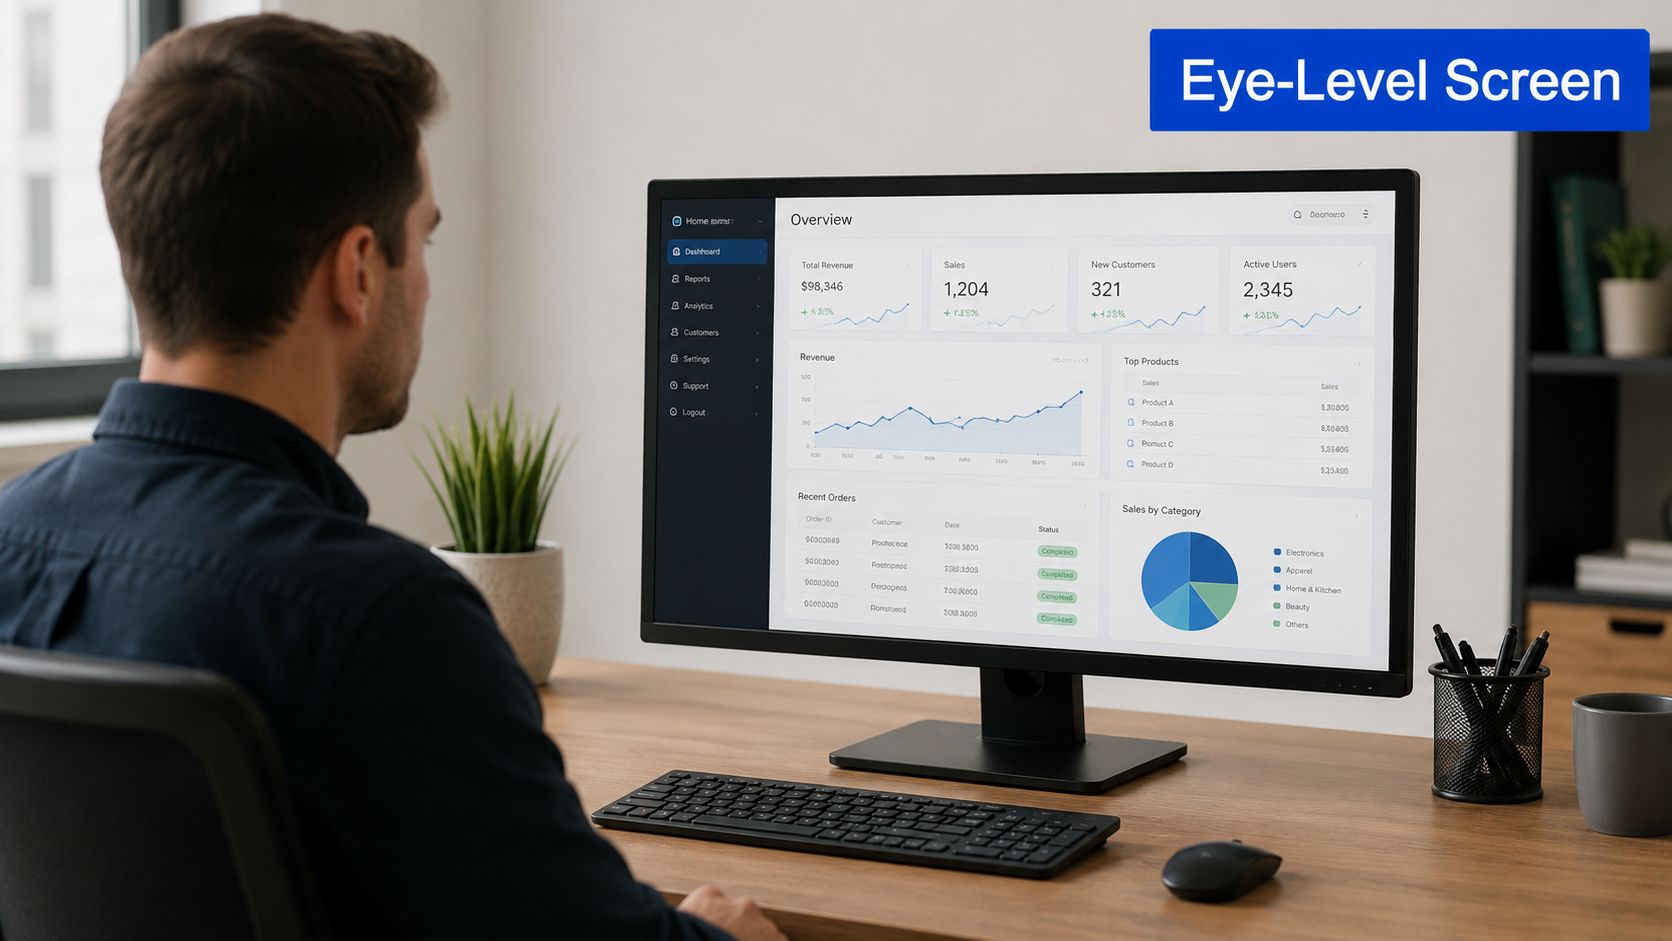
A quick self-check works well here. Sit back. Let your shoulders soften. Look straight ahead, then rest your eyes on the screen. If you have to poke your chin forward to read, the monitor is often too far away, too low, or both.
Screen position also changes with your setup:
- One monitor: place it directly in front of you, centred with your nose
- Two monitors used equally: place them close together, with the join near your midline
- One main monitor and one secondary: keep the main screen in front and angle the second inward
This is less about perfect posture and more about reducing repeated rotation. Small neck turns are fine. Hundreds of them each day can become irritating.
Chronic-pain adjustment
If you live with neck pain, headaches, jaw tension, or persistent upper-back stiffness, avoid turning monitor setup into a posture drill. “Sit straight” often makes people brace. Bracing can feel tidy for a minute and tiring by lunchtime.
A better cue is to let the head balance over the shoulders while the breastbone stays easy and the ribs can move with breathing. That fits an osteopathic view of desk setup. The neck works best when the eyes, rib cage, and upper back share the load instead of asking one area to hold everything still.
Progressive or bifocal lenses change the picture. If you need to tip your chin up to bring text into focus, lower the monitor slightly until your eyes can scan the screen without neck extension. A technically correct height that increases strain is not the right height for your body.
Remote workers often run into this problem with laptops. A laptop works like a book glued to a keyboard. If the screen is low enough for the hands, it is usually too low for the neck. A stand or a stable stack of books can raise the screen, and an external keyboard and mouse let you keep that gain. If you want a visual example, this posture and corporate ergonomics reference image shows the general line you are trying to create.

Use this printable checklist line for your workstation review:
- Monitor check: top of screen near eye level, screen about an arm's length away, text readable without chin jutting, main screen centred, no sustained neck turning to work
2. Chair Height and Lumbar Support Configuration
What happens if the chair is off by just a few centimetres? The rest of the workstation often has to compensate. You reach for the keyboard, lift the shoulders, perch on the seat edge, or tuck a foot under the chair to feel stable.
An osteopathic view starts with support and load sharing. The pelvis, lower ribs, and feet work together like the base of a tripod. If one point is unstable, the spine above it usually stiffens or slumps to cope. That matters even more for desk workers and remote employees with chronic pain, because a chair that looks “correct” can still be irritating if it creates pressure or asks the body to hold one position too long.
Set the seat height first
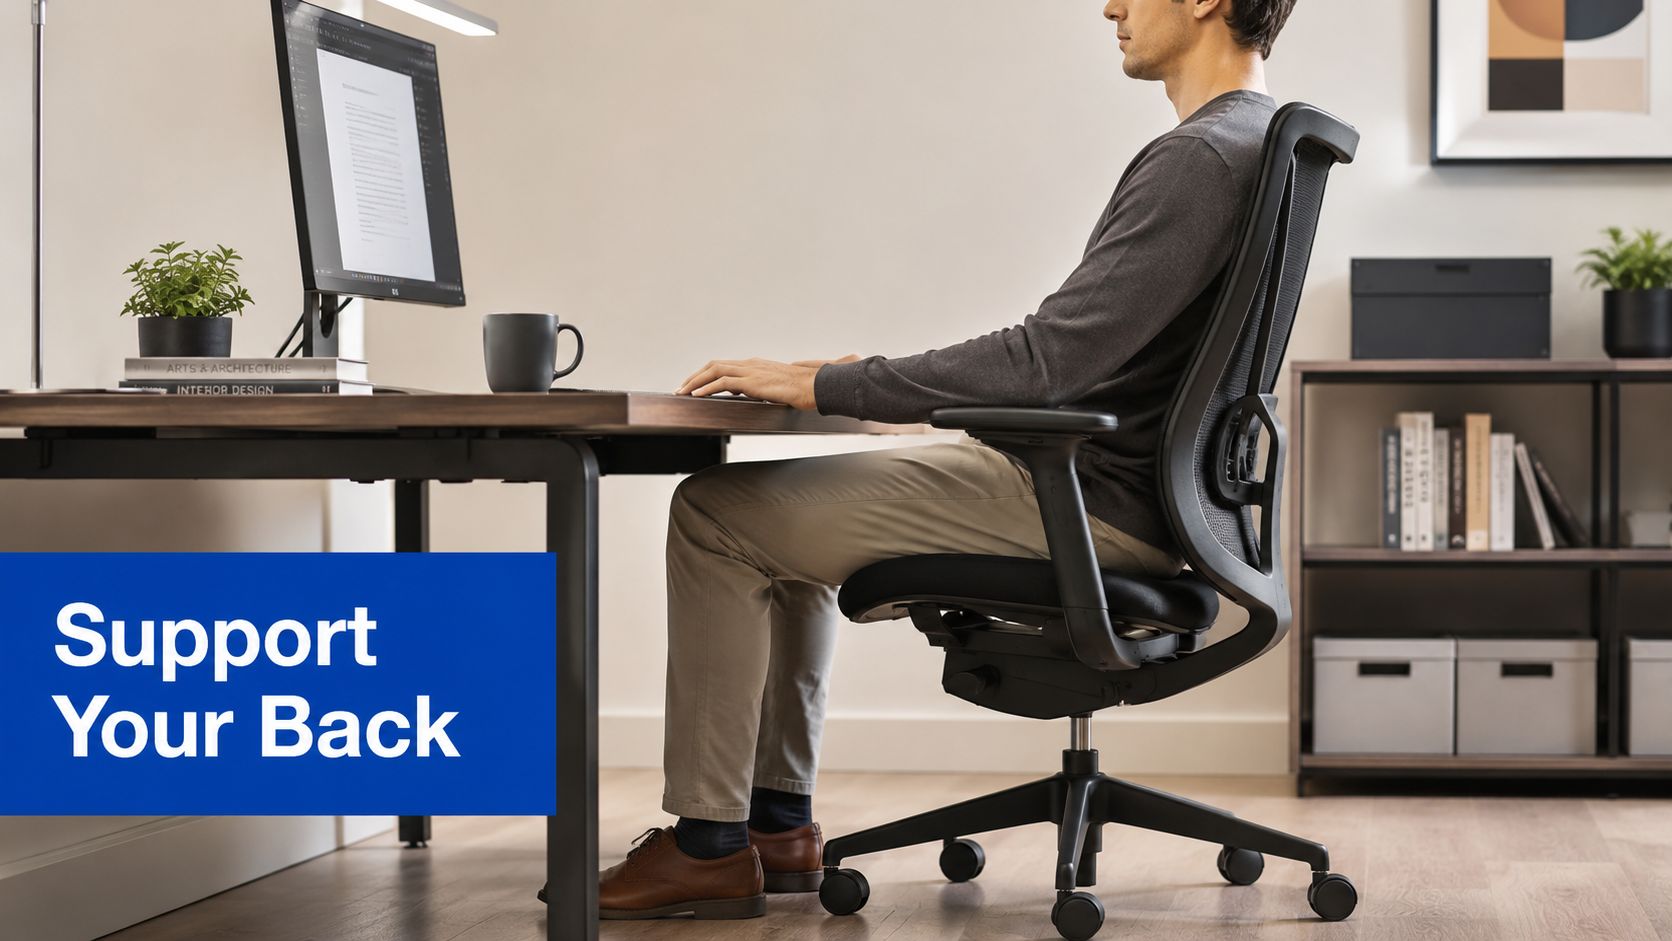
Adjust the chair so your feet rest fully on the floor, or on a footrest if needed, and let the knees sit about level with the hips or slightly lower. This usually gives the pelvis a more neutral starting point and reduces the urge to slide forward.
If your feet dangle, the front of the seat presses into the thighs and the lower back often loses support. If your knees are much higher than your hips, the pelvis tends to roll back and the lumbar curve flattens. Both patterns can feel minor at first and tiring after an hour or two.
Match the backrest to your lower back
Now adjust the backrest so it meets the natural curve above the belt line, not the waist and not the upper back. A chair works best when it supports the lumbar area gently enough that breathing stays easy and you do not feel pinned in place. Many people do well with a slight recline rather than sitting bolt upright, because the backrest can share some of the load that the spinal muscles would otherwise hold alone.
For a visual reference, this supported desk posture example shows the general alignment you are trying to create.
If the chair back is too flat, a small lumbar roll or a folded towel can help. Place it in the hollow of the lower back, then sit back into it. The goal is contact, not a hard arch.
Check seat depth before you blame the backrest
Seat depth is easy to miss. Sit all the way back, then check the space between the chair edge and the back of your knees. A small gap is usually enough. If the seat is too deep, you will either slump to reach the backrest or sit forward and lose lumbar support. If it is too short, the thighs do not get enough support and the body can feel less grounded.
This is one reason chronic pain adaptations need to be practical, not rigid. A shorter person working from home may need a footrest and lumbar support at the same time. A taller worker may need more seat depth but less backrest pressure.
Use armrests carefully
Armrests can reduce load through the neck and upper back when they support the forearms between tasks. They should sit low enough that the shoulders stay relaxed. If the armrests stop you from getting close to the desk, they are too high, too wide, or not helpful for your setup.
During typing, many people feel better with the forearms free and the chair pulled in closer. Between tasks, the armrests can give the shoulders a break.
Good chair setup should feel settled and easy within a few minutes. If you keep shifting to escape pressure, the chair still needs adjustment.
Use this printable checklist line during your workstation review:
- Chair check: feet supported, knees level with or slightly below hips, lower back gently supported, small gap behind knees, shoulders relaxed, armrests helpful rather than in the way
This quick demonstration can help you compare your setup against common chair-positioning cues.
For readers who want one external reference on chair setup benchmarks, this Australian workstation setup checklist from Pago International gives a useful summary of common adjustment points.
3. Keyboard and Mouse Positioning
What does your body do to reach your keyboard and mouse. That is the test.
A good setup lets the hands work near the body, with the shoulders quiet and the wrists close to neutral. A poor setup creates a chain reaction. The hand reaches first, then the forearm rotates, then the shoulder drifts out, and the neck joins in to stabilise the whole pattern. That sequence matters for desk workers with recurring tension because pain rarely stays in one small spot.
Keep input devices close enough to reduce strain up the chain
Place the keyboard directly in front of you and keep the mouse beside it on the same surface and at the same height. Your elbows should rest near your sides rather than winging outward. If the mouse sits far away, the upper arm stays slightly lifted for long periods, which can load the outer shoulder and upper trapezius.
Wrists should stay fairly straight while typing. They do not need to be held stiffly in the air, but they should not be bent up, down, or sharply to one side. If you feel pressure at the heel of the palm, the desk edge may be too sharp, the keyboard may be too far away, or you may be parking your weight on the wrists between keystrokes.
Use this quick checklist line during your workstation review:
- Keyboard and mouse check: keyboard centred to body, mouse close to keyboard, elbows near sides, wrists mostly straight, shoulders relaxed, no pressure from the desk edge, pointer device easy to reach without leaning
For remote workers, a visual example can help. This working-from-home ergonomic workspace example shows the kind of close, supported arrangement you want to copy.

Use the keyboard for typing, not for reaching
Many people place the keyboard too high on the desk or leave it pushed back behind notebooks, chargers, or a laptop. That forces the arms to reach forward all day. A simple rule helps. The home row should sit where your hands can land without your shoulders moving first.
If you use a full-size keyboard but rarely touch the number pad, a compact keyboard may reduce the distance to the mouse. That small change can make a big difference for people with one-sided shoulder or forearm pain.
Laptop setups need one clear choice
A laptop alone usually puts the screen and keyboard in conflict. If the screen is at a good height, the keyboard is too high. If the keyboard feels right, the screen is too low. The usual fix is a laptop stand with an external keyboard and mouse.
That matters even more in chronic pain. Osteopathic care often looks at how one region compensates for another. A lowered gaze can increase upper neck tension. A flared elbow can increase rib and shoulder effort. A bent wrist can tighten the forearm. In other words, the hand position works like the last link in a longer chain.
Adapt the setup to symptoms, not just to textbook angles
People with persistent wrist, forearm, or neck pain may need a modified setup rather than a standard one. A split keyboard can reduce forearm rotation for some users. A vertical mouse can help some people who feel sore through the outer forearm or thumb side of the wrist. Others do better by alternating devices across the day rather than searching for one perfect tool.
The checklist should guide a short trial. Change one variable, use it for several days, and note what happens to symptoms during work and later that evening. If the hand feels better but the shoulder feels worse, the device may be solving one problem by creating another.
A well-placed keyboard and mouse should make typing feel quiet, light, and repeatable. If your body keeps bracing before you start work, the setup still needs adjustment.
4. Desk Height and Work Surface Organization
What happens if your keyboard and mouse are in the right place, but the desk itself still makes you brace? The work surface can subtly undo the rest of the setup.
Match the desk to the task, not just the room
Desk height should let your forearms rest comfortably while your shoulders stay soft and your ribs do not lift to help your arms work. A useful check is simple. Sit as you normally would, let your upper arms hang close to your sides, and bend your elbows to about 90 degrees. The desk should meet that working height, or come close enough that you are not hiking the shoulders, dropping the trunk, or reaching up with the wrists.
This matters in an osteopathic sense because the body rarely compensates in only one place. A desk that sits too high can increase tension through the neck, jaw, and upper ribs. A desk that sits too low can pull you into a rounded trunk and heavier pressure through the forearms. The surface is not just a platform for equipment. It sets the starting position for the whole chain above and below it.
If the desk is fixed and too high, raise the chair, then check whether your feet still have support. If the desk is too low, a keyboard tray or a small riser for selected items can help. The goal is not a perfect textbook angle. The goal is a work position your body can repeat without guarding.
Organise the surface by reach, not by appearance
A tidy desk can still create extra strain if the items you use all day sit just outside easy reach. Desk organisation works best when it follows frequency of use.
Use three reach zones:
- Primary zone: Items you touch often, such as your keyboard, mouse, notebook, headset, and drink.
- Secondary zone: Items you use a few times a day, such as a diary, charger, or active documents.
- Storage zone: Items you rarely need, such as reference folders, spare equipment, and archived paperwork.
This works like setting up a kitchen bench. The knife, chopping board, and ingredients for the current meal stay close. The slow cooker and baking tray can live farther away. Your desk needs the same logic so your shoulders and trunk are not doing hundreds of small, unnecessary reaches across the day.
For desk workers with chronic pain, this step often matters more than expected. Repeated reaching for a phone, notebook, or dock can irritate a sensitive shoulder, thoracic spine, or wrist even if each single movement looks harmless. Bringing high-use items inward reduces those small accumulations of effort.
Create a pain-friendly work surface
Remote employees often work on dining tables, narrow benches, or shared family spaces. In those setups, work surface depth and clearance matter as much as height. You need enough room to bring the keyboard and mouse close, support the forearms lightly if that feels helpful, and keep the screen at a distance that does not pull your head forward.
People with persistent pain may also need a modified layout rather than a standard one. If one shoulder is irritable, place the mouse and any writing tasks where that arm does less reaching. If low back pain increases with prolonged forward lean, clear the front edge of the desk so you can sit closer instead of stretching toward the screen. If pelvic or rib stiffness makes symmetry uncomfortable, it can help to keep the setup balanced overall while allowing small position changes during the day.
For a visual reference, compare your space with this working from home ergonomic workspace example. The room does not need special furniture. It needs a surface arrangement that lets your body work with less compensation.
5. Footrest Usage and Lower Limb Support
Have you ever adjusted your screen and chair, then still felt oddly unsettled in the seat by midday? The missing piece is often below the desk. If the feet are not well supported, the body loses a stable base, and that instability can travel upward through the knees, hips, pelvis, and low back.
From an osteopathic point of view, the body works as an interconnected system. A footrest is not just a comfort accessory. It helps create a grounded starting point so the pelvis does not have to keep searching for balance. That matters for desk workers, remote employees, and anyone using a setup that cannot be fully adjusted.
Check whether your feet are actually supported
Start with a simple test. Sit back in the chair with your lumbar support in place and notice what your feet do without effort. They should rest fully on the floor with the weight spread across the soles, not just the toes or heels.
If your feet hover, if only the balls of the feet touch, or if you tuck one foot under the chair for relief, your lower body is compensating. That often changes pelvic position and can increase tension through the low back or hips over time.
A footrest helps when the chair needs to stay higher to match the desk or keyboard height. The goal is not a rigid 90-degree pose. The goal is a supported, easy position where the thighs are roughly level or slightly downward and the ankles are relaxed.
How to set the footrest
Use the checklist below as a quick print-and-check step:
- Place the footrest so both feet can rest on it fully.
- Adjust the height so the knees feel easy, not sharply lifted.
- Choose a tilt that supports the whole sole rather than forcing the toes up.
- Keep enough space under the desk to move the legs without hitting the frame.
- Recheck the setup after any chair-height change.
A good footrest works like a small ramp for the lower body. It gives the legs somewhere definite to settle so the pelvis and spine do less unnecessary work.
Adaptations for chronic pain and home offices
People with persistent low back pain, sacroiliac irritation, hip stiffness, or ankle swelling often do better with support that allows small position changes. An angled or gently mobile footrest can make those shifts easier while still keeping contact under the feet. That fits well with a pain-sensitive approach, because chronic pain usually responds better to variation and reduced threat than to forcing one fixed posture all day.
Standing workstations need the same logic. As noted earlier, standing tolerance should be built gradually, and hard flooring often benefits from a supportive mat. The aim is to reduce strain through the feet and lower limbs so the rest of the body does not brace around it.
At home, a purpose-built footrest is helpful, but a firm box or stable sloped support can work if it does not slide or collapse. Avoid cushions, soft bags, or uneven stacks of books. If the base moves under you, your body keeps trying to correct for it.
If your feet are searching for a place to land, your workstation still needs one more adjustment.
6. Document Holder and Reference Material Positioning
Paper still creates a lot of neck strain. So do notebooks, tablets, and printed reference sheets spread flat across the desk.
Bring paper into your visual line
Place reference material close to screen height instead of forcing repeated downward glances. A document holder positioned between the keyboard and monitor, or just beside the screen at similar height and distance, reduces the constant neck flexion and twisting that builds up over the day.
This matters even more if you enter data, check forms, review spreadsheets, or copy notes from paper to screen. The movement seems small, but repeated hundreds of times it can become a clear pain trigger.
A strong office ergonomics checklist asks you to check two things here. First, is the document close enough that you're not reaching? Second, is it high enough that your eyes, not your whole neck, do most of the movement?
Remote work adaptation
Home offices often miss this step because people improvise. They place papers on the table, use a laptop off to one side, or prop a notebook on their knee during video calls. Over time, those workarounds can be surprisingly aggravating.
Mainstream checklists often lag behind remote work realities. One home office ergonomics report from Chubb Australia in 2024 found that 76% of remote workers used furniture without lumbar support or adjustable armrests, while only 12% of checklists included home-specific modifications. The same verified data set also notes that University of Melbourne safety guidance for 2025 highlights wrist pain from laptop-only setups among home workers, showing how often domestic spaces need different ergonomic adjustments.
A practical home solution can be simple. Use a cookbook stand, a tablet stand, or a ring binder turned into a sloped support. If you reference digital files all day, a second monitor at the right height may do the same job more neatly than piles of paper ever could.
7. Lighting and Glare Reduction Assessment
Do your eyes feel more tired at 3 pm than they did at 9 am, even when your chair and screen height seem right? Lighting is often the missing piece. If your visual system has to work too hard, the rest of the body starts helping in unhelpful ways. You lean closer, tighten the jaw, lift the shoulders, and hold the neck stiff so the eyes can keep doing their job.
That pattern matters in osteopathic care because the body works as a connected unit. Strain around the eyes can show up as tension through the forehead, jaw, upper neck, and even the upper ribs. For desk workers with chronic pain, poor lighting can act like a low-level irritant that keeps the body guarded for hours.
Start with the window. A screen usually works best when it sits at a right angle to natural light, not directly in front of it and not with the window behind it. That setup reduces the bright-dark contrast your eyes have to keep correcting. Then check screen brightness. It should match the room closely enough that the display feels easy to read, not glaring and not dull.
Use this part of your printable checklist like a room scan:
- Window glare: Close blinds, use sheer curtains, or rotate the desk slightly until reflections stop pulling your gaze.
- Task light placement: If you write by hand, place a lamp on your non-dominant side so your writing hand does not create a shadow over the page.
- Monitor angle: Tilt the screen slightly if overhead lights reflect across the display.
- Contrast check: Open a document with black text on a white background. If you squint, lower glare first, then adjust brightness.
- Pain cue check: Notice whether headaches, jaw clenching, or brow tension increase during visually demanding tasks.
A quick test helps. Turn the screen off for a moment and look at what the room light is doing on the blank surface. If you see a window, ceiling light, or bright hotspot reflected back at you, your neck and eyes have probably been compensating all along.
For remote workers, this step often gets missed because home lighting is built for living, not sustained computer work. A dining table under a pendant light, a laptop near a sunny window, or a spare-room desk with one harsh bulb can all push you into the same protective posture. Small fixes matter here. A lamp, a desk rotation, or a curtain can reduce muscular effort more than people expect.
If you live with chronic neck pain or tension headaches, aim for lighting that lets your face stay soft. That means less squinting, less jaw bracing, and less upper-cervical guarding. This guide to reducing muscle tension with osteopath advice fits well with that approach. Good lighting does more than help you see. It lowers the amount of unnecessary work your body does while you sit.

8. Movement Breaks and Postural Variation Protocol
What happens to a well-adjusted workspace if your body stays in one position for hours? The setup still helps, but the body is built for small shifts, changing loads, and regular motion. A good checklist needs a movement plan, not just a furniture plan.
Movement is part of ergonomics
Static posture is a little like holding a grocery bag with your arm out straight. The weight may be manageable at first, but the longer you hold it without change, the more your muscles start to brace, fatigue, and compensate. Desk work creates the same problem in quieter ways. The neck fixes the eyes on the screen. The ribs stay lifted. The hips barely move. Over time, even a "good" posture can become a strain if it never changes.
That matters even more from an osteopathic perspective, which looks at how one area affects the rest of the body. A stiff thoracic spine can increase neck effort. A braced jaw can feed upper-shoulder tension. Reduced ankle and hip movement can make sitting feel heavier through the low back. Postural variation helps interrupt those chains before they build into pain.
A practical rhythm for the day
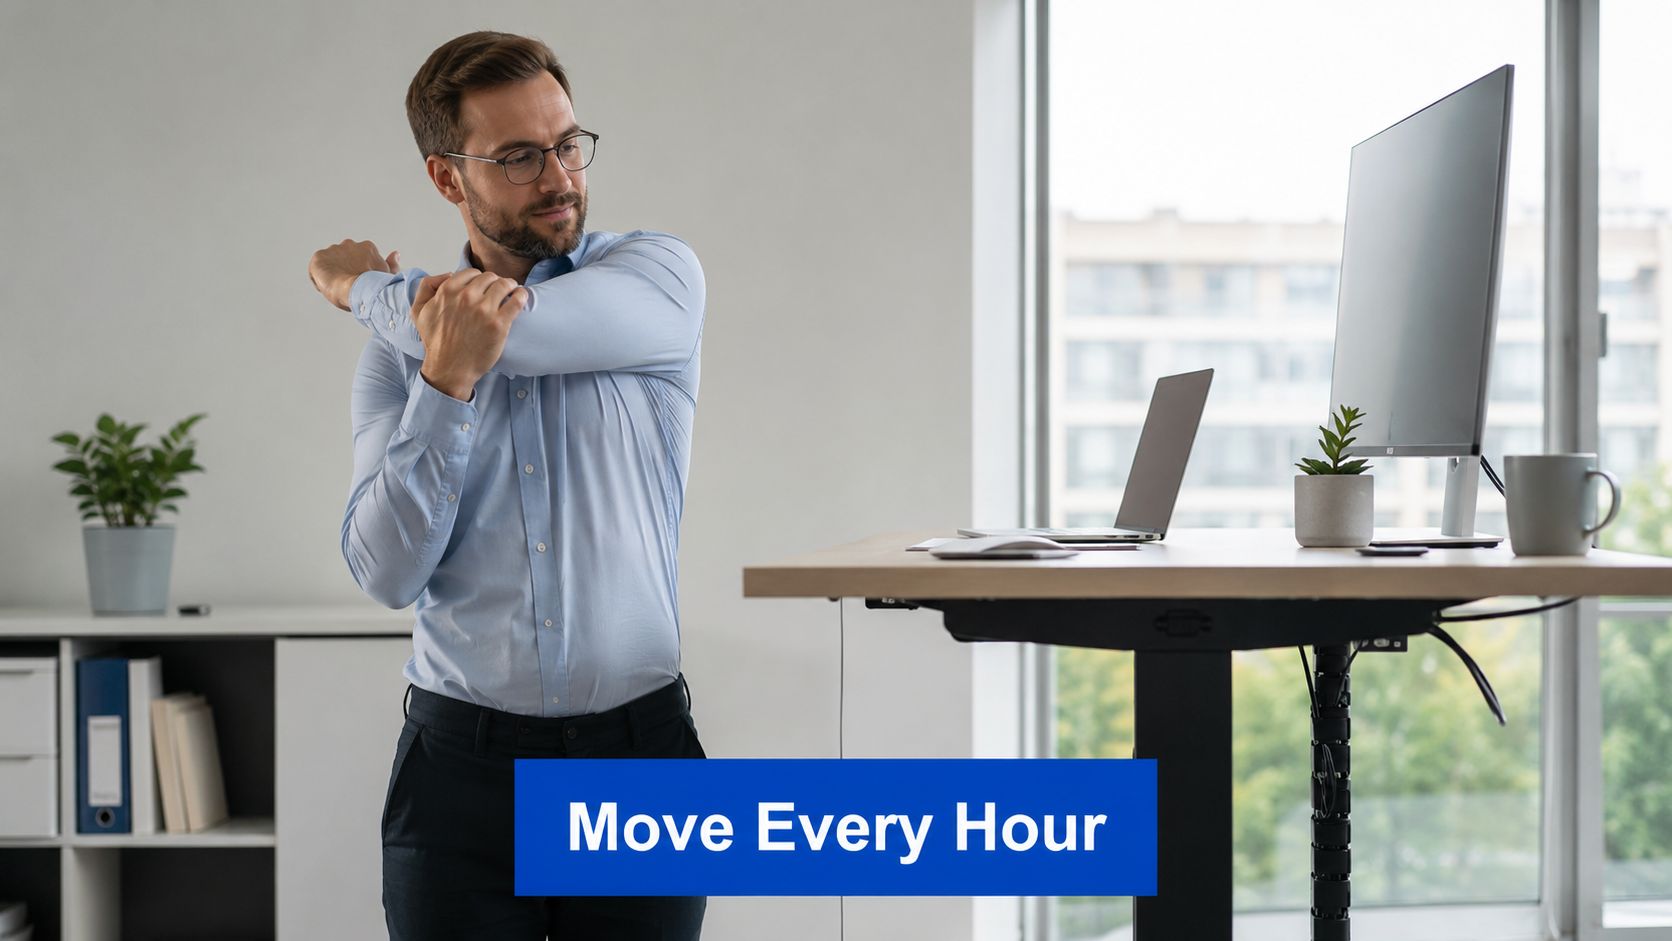
The best break schedule is one you can repeat on a busy Tuesday, not just on a calm day. Keep it simple and attach it to tasks you already do. Stand for phone calls. Walk while reading a document. Shift from sitting to standing at the end of a meeting or before starting a new task. That approach turns movement into part of work instead of one more job to remember.
For readers managing persistent tightness, osteopath guidance on reducing muscle tension supports the same idea. Gentle, repeated resets are often easier for the nervous system to tolerate than waiting until the body is stiff and then doing one long stretch.
Use this printable protocol:
- Every 10 to 15 minutes: change something small. Unclench the jaw, rest the tongue, lower the shoulders, or shift your feet.
- Every 30 to 60 minutes: stand, reach, walk to get water, or do one brief task away from the desk.
- Every 1 to 2 hours: change posture more clearly. Sit if you have been standing, stand if you have been sitting, or take a short walk.
- During pain flare-ups: make the reset smaller and more frequent. A 20-second position change is often better tolerated than forcing a big stretch.
For chronic pain, this distinction matters. Sensitive tissues and sensitized nervous systems often respond better to variety, pacing, and gentle motion than to rigid rules about perfect posture. The goal is to give the body options throughout the day so no single area has to do the same job without relief.
Aim for many comfortable postures across the day.
If you are turning this article into a checklist, add one final box: "I have a movement cue I can follow without thinking." That cue might be each email sent, each meeting ended, or each time you refill your water bottle. A workstation supports your body best when it also reminds your body to move.
8-Point Office Ergonomics Checklist Comparison
| Item | Implementation Complexity 🔄 | Resource Requirements ⚡ | Expected Effectiveness ⭐ | Primary Impact 📊 | Quick Tip 💡 |
|---|---|---|---|---|---|
| Monitor Height and Distance Adjustment | Low, simple repositioning; moderate for multi-monitor setups | Low–Moderate: adjustable stand/arm, anti-glare filter recommended | High, reduces neck/eye strain and prevents forward-head posture | Fewer headaches and neck complaints (eg. ~40% reduction reported) | Top of screen at/below eye level; 50–70 cm distance; use 20-20-20 rule |
| Chair Height and Lumbar Support Configuration | Moderate, requires individual calibration and periodic readjustment | Moderate–High: ergonomic chair or lumbar roll; replacement every few years | High, preserves lumbar lordosis and lowers disc pressure | Reduced lower-back pain and sick leave (eg. ~35% reported) | Feet flat, knees ~90°; position lumbar support 4–6" above seat |
| Keyboard and Mouse Positioning | Low–Moderate, tray or device changes; adaptation period for ergonomic gear | Low–Moderate: keyboard tray, ergonomic keyboard/mouse, possible sensitivity tweaks | High, prevents RSI, reduces shoulder/neck tension | Decreased wrist/forearm pain and improved shoulder mechanics (eg. 50% reduction) | Keep keyboard at elbow height; mouse close; wrists neutral; use shortcuts |
| Desk Height and Work Surface Organization | Moderate, may need workspace assessment or desk replacement | Moderate–High: adjustable desk or riser, reorganisation of work zones | High, supports natural arm positioning, reduces compensation through spine | Improved ergonomic compliance and lower postural strain (eg. ~28% improvement) | Set desk for 90° elbows; keep frequently used items within arm's reach; consider sit–stand |
| Footrest Usage and Lower Limb Support | Low, simple addition and positioning | Low: adjustable or textured footrest recommended | Moderate, prevents anterior pelvic tilt and reduces leg fatigue | Reduced ankle swelling and lower-back discomfort for short users | Ensure feet rest flat with 90° ankles; prefer adjustable/active footrests |
| Document Holder and Reference Material Positioning | Low, easy install but requires workflow change | Low: document holder or second monitor | Moderate–High, reduces neck flexion and rotation | Lower cervical strain and improved reading accuracy (eg. ~45% reduction) | Place holder between keyboard and monitor at same distance; tilt 20–40° |
| Lighting and Glare Reduction Assessment | Moderate, requires assessment and environmental changes | Moderate: task lighting, anti-glare filters, possible fixture changes | High, reduces eye strain, headaches and forward-head posture | Fewer headaches and neck tension (eg. ~30% reduction) | Position desk perpendicular to windows; use indirect task lighting; match screen brightness |
| Movement Breaks and Postural Variation Protocol | Low–Moderate, simple personally; higher if cultural change needed | Minimal–Moderate: reminders/apps, sit–stand desk optional | Very High, prevents cumulative strain and supports circulation | Large reductions in musculoskeletal complaints (25–40%) and improved focus | Schedule breaks every 30–60 min; use micro-movements and walking meetings |
Next Steps to a Healthier Workspace
What should you do after you finish an office ergonomics checklist. Treat it like a printed map, then test the route with your own body.
A good setup changes with the day. Email, focused writing, spreadsheets, video calls, and design work load the body in different ways. Sleep, stress, footwear, and pain history change it too. A workstation that feels comfortable at 9 a.m. can feel cramped, tense, or tiring by mid-afternoon.
That is why a checklist works best as a short daily review, not a one-time fix. Start with the screen and chair, then check the smaller contact points. Are your shoulders still relaxed. Have the keyboard and mouse drifted outward. Do your feet still feel supported. Small corrections made early often prevent the familiar pattern of neck tightness, wrist irritation, or low-back ache that builds over several hours.
Osteopathic care adds a useful lens here. The goal is not to freeze yourself in one perfect posture. The goal is to help the whole body distribute load more evenly, the way a well-balanced backpack feels lighter because no single strap takes all the strain. At the desk, that means your breathing, rib movement, pelvic position, joint mobility, and muscle tension all influence how comfortable your setup feels. A screen problem can show up as neck pain, but the neck may only be the loudest part of a larger chain.
Chronic pain needs the same practical mindset. Standard ergonomic advice gives you a starting point, not a rulebook. If you live with arthritis, disc irritation, headaches, shoulder tension, or an older wrist injury, the best setup may look slightly different from the textbook version. A lower monitor can help if you wear multifocal lenses. Softer lumbar support may feel better than firm support. A split keyboard or larger mouse may reduce irritation better than a standard device. Your symptoms are feedback, not failure.
Remote workers often need even more adaptation because home setups are rarely built for long desk hours. A dining chair, couch, or laptop on a bench can work for a short task, but over a full workday it often pushes the body into fixed positions. If you cannot change everything at once, fix the highest-impact items first. Raise the screen, use a separate keyboard and mouse, support the feet, keep regular-use items close, and schedule movement before discomfort reminds you.
Print the checklist. Use it at the start of the day, after lunch, and whenever pain begins to creep in. If symptoms keep returning, a personal assessment can help connect the dots between workstation setup, movement habits, and the way your body compensates under load.