

Is persistent lower back pain limiting your day, even though you've been told to “just stretch more” or “rest it”? That advice misses an important gap. Not all back pain responds to the same movement, and doing more of the wrong exercise can leave you sorer, stiffer, and less confident in your body.
In Australia, low back pain affects about 4.0 million people, or 15.7% of the population, according to the Australian Institute of Health and Welfare data referenced in this review. That scale is one reason modern care now leans heavily toward activity, graded exercise, and self-management rather than bed rest. The good news is that targeted movement can be one of the most useful tools for relief when it matches your symptoms, current strength, and daily demands.
This guide gives you eight practical lower back pain relief exercises that osteopaths and rehab-focused clinicians commonly use to restore mobility, improve trunk support, and reduce flare-ups. You'll also find a simple 4-week progression, modifications for older adults and people with arthritis, and clear advice on when pain needs assessment rather than more stretching. If you sit for work, feel stiff on waking, or want a gentle drug-free way to support your spine, this is a sensible place to start.
Table of Contents
- 1. Cat-Cow Stretch (Marjaryasana-Bitilasana)
- 2. Glute Bridge
- 3. Dead Bug Exercise
- 4. Child's Pose (Balasana)
- 5. Bird Dog Exercise
- 6. Quadruped Spinal Extension (Superman Hold on Hands and Knees)
- 7. Lumbar Rotation Stretch (Spinal Twist)
- 8. Planks and Modified Planks (Forearm and High Plank)
- Lower Back Relief: 8-Exercise Comparison
- Take the Next Step Towards a Pain-Free Back
1. Cat-Cow Stretch (Marjaryasana-Bitilasana)
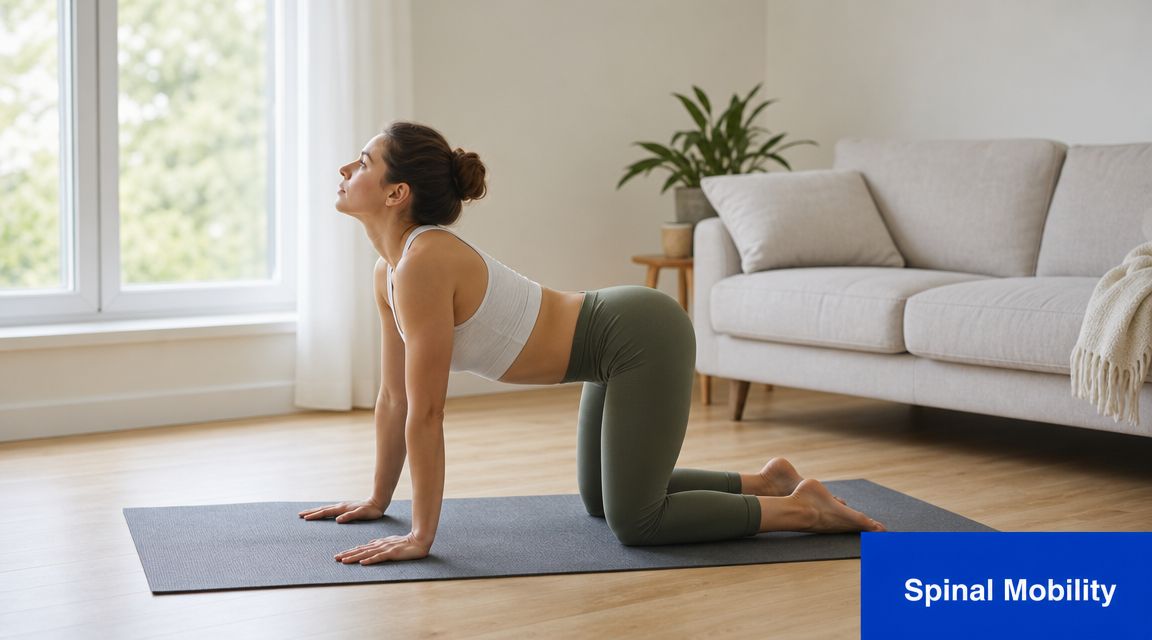
Do you feel stiff through the lower back first thing in the morning, or after an hour at the desk or in the car? Cat-cow is often the safest starting point because it restores movement without asking the back to carry much load.
Why it helps
Cat-cow takes the spine through gentle flexion and extension while the hands, hips, ribs, and shoulders share the movement. That matters because a sore lower back often gets overloaded when nearby areas become stiff. In practice, I use this exercise to help people spread motion more evenly through the whole trunk instead of forcing one irritated segment to do all the work.
It also helps settle guarding. When the back feels threatened, people often brace, hold their breath, and move as one rigid block. Slow, comfortable spinal motion paired with easy breathing can reduce that protective tension and improve body awareness. For many people, that is the first step in a 4-week plan before adding more demanding work such as bridges, bird dog, or planks.
Current guidance supports staying active and using simple exercise as part of lower back pain care rather than prolonged rest. The Low Back Pain Clinical Care Standard from the Australian Commission on Safety and Quality in Health Care reflects that approach.
How to do it well
Start on hands and knees on a padded surface. Place your hands under your shoulders and knees under your hips. As you breathe in, let the breastbone move forward and the tailbone tip up slightly. As you breathe out, gently round through the middle and lower back without pushing to the end of range.
Keep the movement small if your back is sensitive. Smooth movement matters more than a big shape.
Use these cues:
- Match movement to breath: Inhale as you open the front of the body. Exhale as you round.
- Move one part at a time: Let the pelvis, lower back, ribs, and neck join in gradually rather than snapping into position.
- Keep the neck relaxed: Look slightly ahead or down to the mat. Avoid cranking the head up or forcing the chin to the chest.
- Stop short of pain: A mild stretch or sense of stiffness easing is fine. Sharp pain, leg pain, or increasing pins and needles is not.
Practical rule: If cat-cow leaves you feeling freer after 30 to 60 seconds, keep it in the program. If repeated rounding triggers pain that travels below the buttock or makes the leg feel weaker, stop and get assessed.
Modifications for older adults and people with arthritis
Floor-based positions are not the right entry point for everyone. If kneeling hurts the knees or wrist arthritis makes weight-bearing difficult, place your hands on a bench, kitchen counter, or sturdy table and perform the same spinal motion standing. You still get the mobility benefit with much less pressure through the joints.
For a 4-week progression, start with 5 to 6 slow repetitions once or twice a day in week 1. In week 2, increase the range only if symptoms settle within minutes. In weeks 3 and 4, use cat-cow as a warm-up before the strengthening exercises later in this article. That sequence usually works better than trying to stretch a painful back in isolation.
If stiffness remains high, pain starts waking you at night, or symptoms spread into the leg, it is time for a more specific plan. A local osteopath near you for lower back pain assessment can help determine whether this movement suits your presentation or whether another direction is safer.
2. Glute Bridge
A lot of lower back pain isn't just a back problem. It's a load-sharing problem. When the hips stop contributing well, the lower back often picks up the slack.
Why your glutes matter
The glute bridge strengthens the muscles behind the hips, especially the glutes and hamstrings. Those muscles help control the pelvis when you stand, walk, climb stairs, and get out of a chair. Better hip support usually means less unnecessary strain through the lumbar spine.
This matters most for people who sit a lot. I often see people with sore backs who can't feel their glutes working at all. They arch their back to lift instead of driving through the hips. A bridge teaches the opposite pattern.
Lie on your back with knees bent and feet flat. Press through your heels, tighten your buttocks, and lift your hips until your body forms a gentle line from shoulders to knees. Pause briefly, then lower with control.
A gentler version and progression
If you're very deconditioned or flared up, begin with small lifts. Even a short-range bridge can be useful if the movement stays smooth and comfortable. According to the practical home-program approach outlined in this exercise guidance for lower back pain, simple equipment-free patterns such as bridges are easy to repeat at home and scale over time.
Try these refinements:
- Feet position: Keep them about hip-width apart.
- Effort location: You should feel your glutes and back of thighs more than your lower back.
- Top position: Don't over-arch. Stop when hips are lifted, not jammed upward.
- Progression: Build from a few controlled repetitions toward a fuller daily volume as tolerated.
For older adults with arthritis in the knees or hips, place a folded towel under the head and only lift to a pain-free range. If getting to the floor is difficult, a practitioner can adapt the same hip-extension pattern to a bed or treatment table. If pain persists or you want hands-on guidance with exercise form, local support from an osteopath near you in Bayside can help tailor the movement to your joints and mobility.
3. Dead Bug Exercise
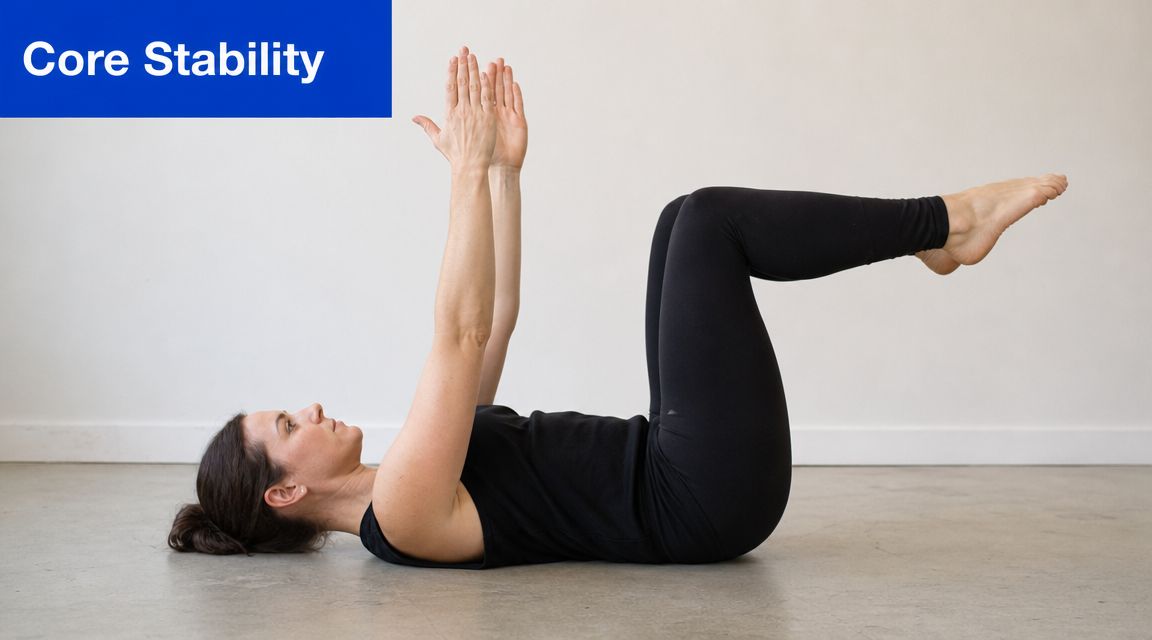
Dead bug looks simple. Done properly, it's one of the most useful lower back pain relief exercises for building trunk control without compressing the spine.
Why this one works
Lie on your back with knees bent to tabletop and arms pointing upward. Slowly lower one heel or extend the opposite arm and leg while keeping the trunk steady. The challenge isn't range. It's resisting the urge to arch, twist, or brace excessively.
That makes dead bug ideal for people who need core endurance more than brute strength. Office workers, new exercisers, and people returning from a pain episode often do well with it because the floor gives feedback. If your back starts lifting or your ribs pop up, you know you've gone too far.
A strong home plan usually combines mobility and stabilisation. A 2024 review of exercise interventions for nonspecific low back pain highlights the continuing importance of practical, low-load exercise categories such as lumbar mobility, trunk endurance, and graded strengthening.
Common mistakes to avoid
The biggest mistake is making it too hard too soon. Start with one leg at a time while the arms stay still. If you can hold a steady trunk and breathe normally, then progress to opposite arm and leg.
Useful cues include:
- Flatten gently, don't mash: Let the lower back feel supported by the floor without forcing it.
- Exhale on the reach: That helps the deep abdominals engage.
- Shorten the range if needed: A smaller reach with good control beats a long reach with wobble.
- Keep the jaw and shoulders relaxed: Tension creeps upward fast.
Here's a visual example of the movement pattern:
For arthritis or older adults, put the feet on the floor and slide one heel away at a time rather than lifting both legs. That keeps the exercise effective without overloading the back or hip flexors.
4. Child's Pose (Balasana)
Sometimes the best exercise for a sore back is one that reduces guarding first. Child's pose can do that, especially if your pain feels like compression, fatigue, or end-of-day tightness rather than sharp instability.
When it feels good and when it doesn't
From kneeling, sit your hips back toward your heels and reach your arms forward or rest them by your sides. The position gently lengthens the tissues along the back body, including the lower back, lats, and glutes. Many people also find the breathing component calming, which matters because pain and muscle tension often feed each other.
This pose isn't universal. If deep flexion aggravates your symptoms, or if pain radiates into the leg, a full child's pose may not be your best option that day. That's one reason symptom-specific exercise selection matters more than copying a generic stretch list.
More mobility isn't always better. If a position increases leg pain, numbness, or a feeling of nerve tension, stop and choose a calmer pattern such as walking, supported bracing, or a modified extension drill.
How to modify it
Use a pillow between hips and heels if your knees are stiff. Widen the knees if your belly, hips, or arthritic knees need more room. Rest your forehead on a yoga block, folded towel, or cushion so your neck doesn't have to strain.
The same whole-body logic applies in the upper spine and neck as well. If posture and long hours at a desk are contributing to your back tension, a broader movement routine such as these neck pain relief exercises can complement your lower back work.
Try holding child's pose for a short, easy spell with slow breaths rather than chasing a long stretch. If you come out of it feeling lighter, keep it in your routine. If you feel more folded up or irritable afterwards, swap it for cat-cow or a gentle walk.
5. Bird Dog Exercise
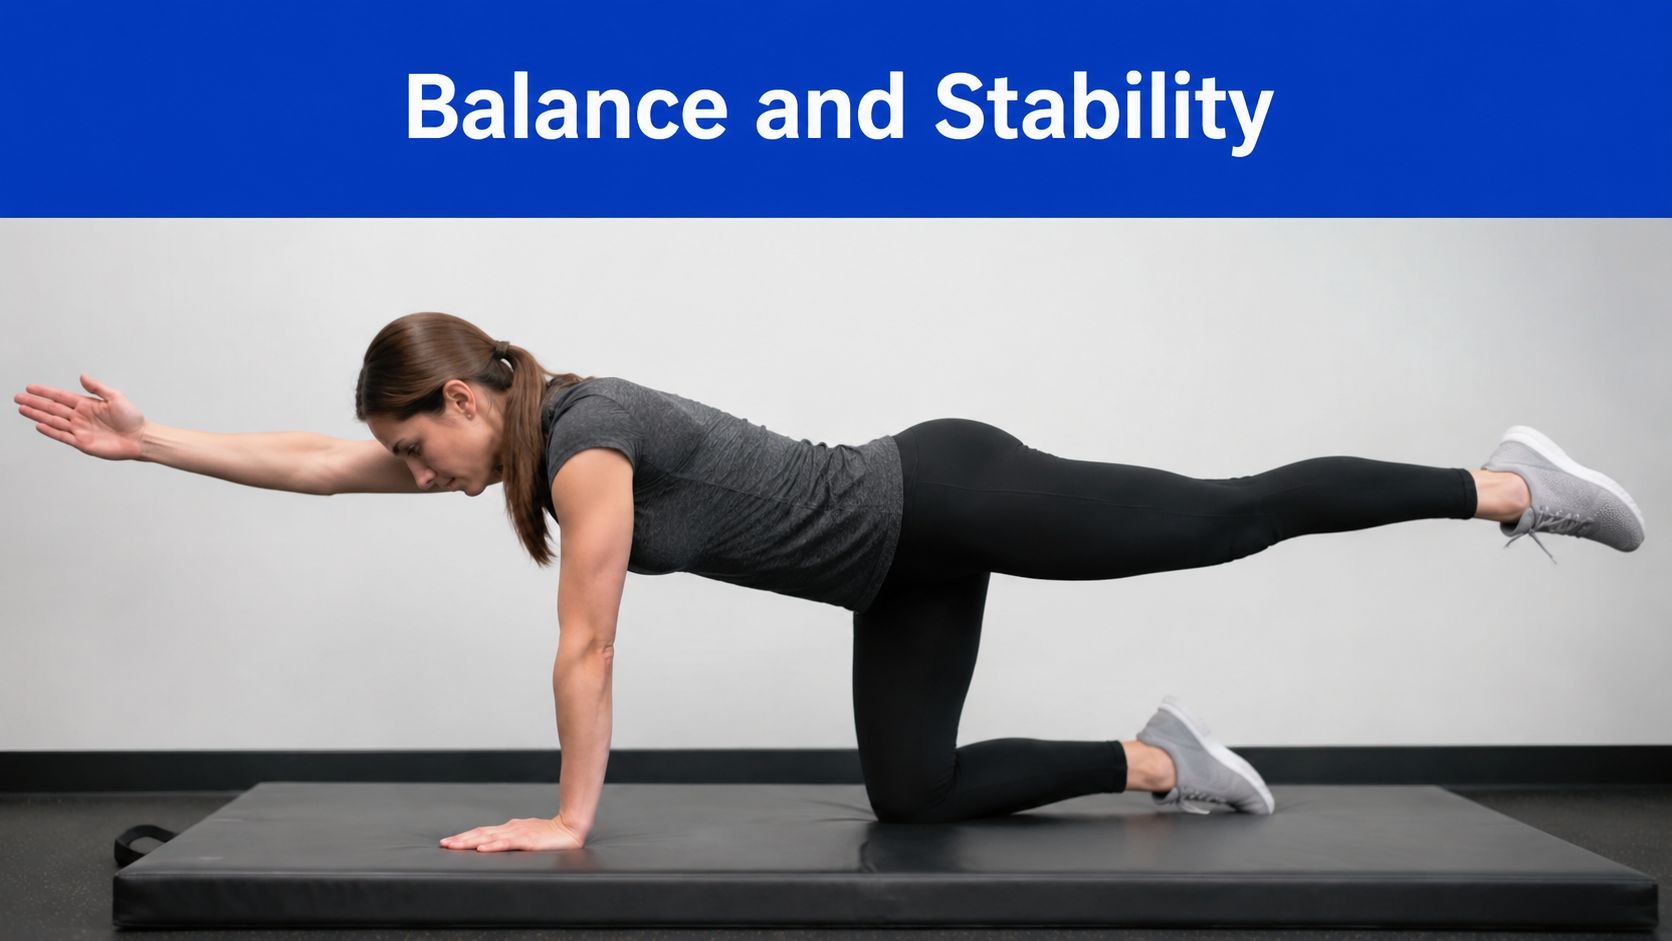
Bird dog is where control starts to look functional. Instead of training the trunk in stillness alone, it teaches the body to stabilise while the arms and legs move.
What it trains
On hands and knees, extend one arm and the opposite leg while keeping the trunk level. That challenges coordination across the hips, shoulders, abdominals, and spinal stabilisers. In daily life, this kind of cross-body control matters when you walk, carry bags, climb stairs, or turn while reaching.
Bird dog is especially useful after the early pain stage, when people need confidence as much as strength. Many patients know they're weak, but what really worries them is the sense that any small movement might trigger pain. This exercise helps rebuild trust in controlled motion.
Australian-facing self-management guidance increasingly emphasises staying active, taking movement breaks, and using simple home exercises rather than defaulting to rest. That practical implementation focus is discussed in this consumer-style overview of exercise and activity for lower back pain.
How to build control first
You don't have to start with the full version. Extend one leg only. Then one arm only. Once your trunk stays steady, combine the opposite arm and leg.
Keep these points in mind:
- Think long, not high: Reach away rather than lifting the limb as high as possible.
- Keep the pelvis quiet: The hips shouldn't roll open.
- Move on the exhale: It often improves trunk control.
- Use a pad under knees: Helpful for anyone with kneecap soreness or arthritis.
A good bird dog feels almost boring. If you're wobbling, twisting, or holding your breath, it's too advanced for now.
For older adults, doing the arm-only version at a bench can be a very sensible first step.
6. Quadruped Spinal Extension (Superman Hold on Hands and Knees)
This exercise trains a quality many sore backs lack. Staying steady for long enough.
From hands and knees, slide one leg back and hold for a few seconds while keeping your spine long and your ribs quiet. The aim is not a big lift. The aim is to build low-level endurance through the back extensors, glutes, and deep trunk muscles that help you stay upright when you stand, cook, walk, or queue.
That is why this version can suit people who flare up with floor-based superman holds done face down. In quadruped, the body has more support, so you can challenge extension control without forcing a big arch through the lower back. For patients with postural fatigue, age-related deconditioning, or an ache that builds later in the day, that trade-off often makes sense.
As noted earlier, exercise helps many people with persistent low back pain. A key question is choosing the right dose and direction. This movement fits well in a 4-week progression plan because it sits between basic control work and stronger anti-rotation or plank-based loading. In week 1, many people start with a toe slide only. In week 2, they hold the leg lightly off the floor. In weeks 3 and 4, they add a longer hold or a slow return without letting the trunk sway.
Best modifications for seniors and sore knees
Knee comfort matters here. Use a folded blanket or pad under the knees, or set your hands on a bench so less body weight goes through the joints. For some older adults, especially those with arthritis in the knees or wrists, a standing hip-extension hold at the kitchen bench is the better first version.
A few adjustments usually clean up the movement fast:
- Reach back before you lift: Length reduces the urge to hinge hard into the lower back.
- Keep the pelvis level: If one hip hikes or rolls out, the exercise is too large for your current control.
- Brace gently through the lower abdomen: Enough to steady the trunk, not enough to hold your breath.
- Look down at the floor: This helps keep the neck and upper back in a calmer position.
If you feel cramping in the low back, shorten the hold and lower the leg. If you feel work in the buttock and a mild effort along the trunk, you are usually in the right area.
For arthritis, I usually prefer shorter holds with more rest rather than pushing through stiffness. Smooth repetition is more useful than forcing range. Stop and get assessed if this exercise brings on sharp back pain, pain that spreads down the leg, numbness, or noticeable weakness. Those signs call for a more individual plan, and in clinic I would want to check whether the issue is simple deconditioning or something more irritable that needs a different starting point.
7. Lumbar Rotation Stretch (Spinal Twist)
This stretch can feel excellent for the right person and wrong for the wrong one. That's why I don't hand it out automatically.
Use this stretch selectively
Lying on your back, gently guide one knee across your body while the opposite shoulder stays relaxed toward the floor. The movement creates rotation through the lower trunk and can release tension around the glutes and side waist. For people who are stiff, it often feels relieving.
But if your pain shoots into the buttock or leg, repeated twisting may stir things up. A major gap in many lower back pain relief exercises articles is that they rarely distinguish local stiffness from possible nerve-root symptoms. This clinical-style overview of stretches and caution around symptom type highlights why generic mobility routines don't suit everyone.
A safer setup
Bend both knees with feet on the floor first. Let the knees fall a small amount to one side rather than yanking one leg far across. Put a pillow under the top knee if the pull feels too strong.
Use these filters:
- Good sign: You feel a mild stretch in the back or glute, then settle afterwards.
- Caution sign: Pain spreads further down the leg while you're in the twist.
- Stop sign: Numbness, clear weakness, or worsening pain with coughing or sneezing.
Older adults with hip arthritis often prefer a very small, supported rotation. Sometimes a side-lying trunk roll with a pillow between the knees is more comfortable than a full spinal twist on the floor.
8. Planks and Modified Planks (Forearm and High Plank)
Planks are popular for a reason, but they're often prescribed badly. People go too hard, hold too long, and end up hanging off their lower back instead of using their trunk.
Endurance matters more than intensity
A plank is an anti-movement exercise. You're teaching the trunk to resist sagging, twisting, and over-arching while the shoulders and hips hold position. That's relevant for prolonged sitting, carrying, housework, gardening, and lifting.
Forearm plank is usually the better entry point because it reduces wrist strain. Start from knees if needed. Keep the ribs stacked over the pelvis and imagine length from head to heels. If you feel only your lower back, you've lost the position.
This kind of active, graded approach fits modern osteopathic and rehabilitation thinking. If you want a broader explanation of why whole-body support, movement quality, and self-management matter, this overview on understanding osteopathy and whole-body health gives useful context.
How to modify without losing the benefit
A shorter, cleaner plank beats a long messy one every time. Build capacity in calm doses.
Try these options:
- Wall plank: Excellent for older adults or painful wrists.
- Bench plank: A strong middle step before floor planks.
- Knee forearm plank: Good for learning trunk position.
- Full forearm plank: Best once you can maintain a straight line without strain.
If a plank creates back discomfort that builds as you hold it, stop before fatigue takes over. Core training should improve spinal support, not test how long you can tolerate poor form.
For people with shoulder arthritis, a plank against a kitchen bench is often far more practical than forcing the standard version.
Lower Back Relief: 8-Exercise Comparison
| Exercise | 🔄 Implementation complexity | ⚡ Resource requirements | 📊 Expected outcomes | 💡 Ideal use cases | ⭐ Key advantages |
|---|---|---|---|---|---|
| Cat-Cow Stretch (Marjaryasana‑Bitilasana) | Very low, simple, rhythmic movement | None (yoga mat optional) | Improved spinal flexion/extension mobility and reduced stiffness | Morning routine, desk breaks, gentle warm‑up | Gentle, highly accessible; promotes spinal articulation |
| Glute Bridge | Low, basic hip hinge and squeeze pattern | None (mat; band for progression) | Greater glute strength and improved pelvic stability; reduced lumbar load | Rehabilitation for weak glutes, posterior chain strengthening | Directly targets gluteal weakness; easily progressed |
| Dead Bug Exercise | Moderate, requires coordination and motor control | None (mat recommended) | Increased deep core activation and spinal stabilisation without lumbar compression | Core rehab, post‑acute strengthening, motor control training | Safe for low back pain; teaches neutral‑spine control |
| Child's Pose (Balasana) | Very low, passive resting posture | None (pillow/block optional) | Spinal decompression, posterior chain stretch, relaxation | Acute pain days, cool‑down, relaxation/meditation | Extremely gentle; aids recovery and parasympathetic calming |
| Bird Dog Exercise | Moderate, balance and anti‑rotation control needed | None (padded surface recommended) | Improved core stability, proprioception and anti‑rotation strength | Rehabilitation, functional training, athlete stability work | Functional transfer to daily movement; evidence‑backed |
| Quadruped Spinal Extension (Superman on hands & knees) | Low–moderate, focus on controlled extension | None (mat) | Strengthened spinal extensors and improved posture | Postural correction, spinal strengthening protocols | Targets erector spinae; simple progression to opposite‑limb variations |
| Lumbar Rotation Stretch (Spinal Twist) | Very low, passive, gentle rotation | None (pillow optional) | Enhanced rotational mobility and myofascial release in lower back/glutes | Post‑activity cool‑down, mobility maintenance, tension relief | Gentle rotational mobilization; easily modified for comfort |
| Planks & Modified Planks | Moderate–high, requires sustained form and endurance | None (mat); variants need minimal props | Greater core endurance and whole‑trunk stability; reduced recurrence risk | Core endurance training, injury prevention, athletic conditioning | Highly effective for endurance; multiple scalable variations |
Take the Next Step Towards a Pain-Free Back
A better back program doesn't start with the hardest exercise. It starts with the right one for your current symptoms. That's the key gap in most advice. People are often given a random list of stretches when what they need is a sequence that matches stiffness, strength, tolerance, and daily load.
A sensible 4-week progression keeps things simple. In week 1, focus on comfort and consistency. Cat-cow, child's pose if tolerated, easy bridges, and short walks are enough. In week 2, add control with dead bug heel slides and bird dog regressions. In week 3, increase volume gradually and introduce quadruped spinal extension or supported planks. In week 4, keep the mobility work that helps, but put more emphasis on endurance and strength, especially bridges, bird dog, and modified planks.
For older adults and people with arthritis, the principle is the same but the setup changes. Use chairs, benches, cushions, and smaller ranges. Floor work isn't mandatory. What matters is regular, low-threat movement that improves confidence and function. If an exercise is technically correct but practically impossible in your home or with your joints, it's the wrong exercise for now.
Red flags matter. Seek prompt assessment if you notice new or worsening leg weakness, significant numbness, changes in bladder or bowel control, severe unrelenting pain, fever, unexplained weight loss, or symptoms after major trauma. Also get reviewed if pain keeps radiating into the leg, doesn't improve with sensible pacing, or keeps flaring every time you try to exercise. In those cases, more stretching isn't the answer.
For many people, the best results come from combining home exercise with professional guidance. An osteopath can assess how your spine, hips, ribs, posture, and breathing are working together, then adapt the program to your body rather than forcing your body into a standard program. That's especially useful if you're older, have arthritis, sit for long hours, or feel unsure which movements are helping versus aggravating symptoms.
If you live locally and want support, Bayside Osteopathic Health offers osteopathic care and exercise-based guidance for back pain as part of a personalised management approach. Start slowly, keep the movements clean, and let progress build week by week. That's how lower back pain relief exercises become sustainable, useful, and part of a stronger spine rather than another short-lived routine.
If your back pain isn't settling, or you'd like help choosing the right exercises for your symptoms, Bayside Osteopathic Health provides gentle osteopathic care, movement advice, and individualized rehabilitation support for people across the Bayside community.